
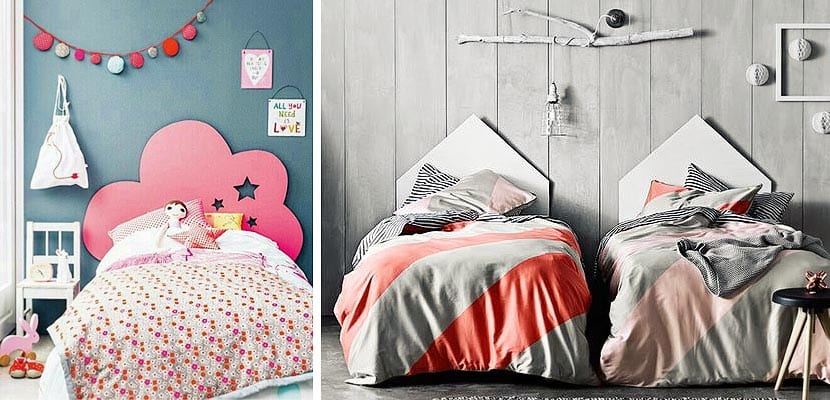
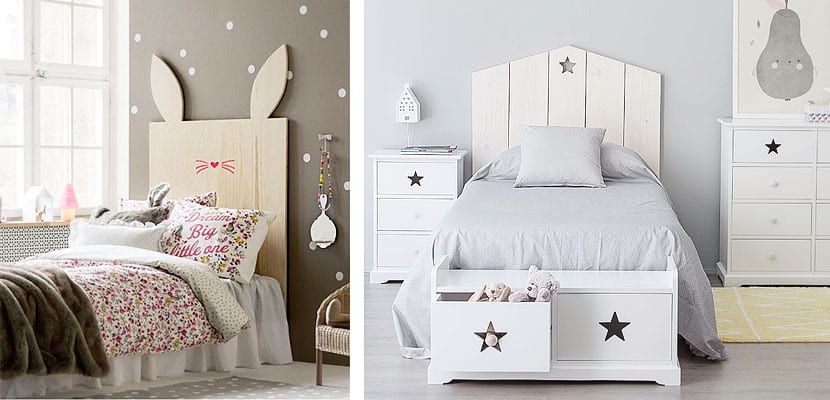
En Decoora We want to give you the confidence and the necessary tools to get involved in decorating the children's bedroom. Two weeks ago we showed you ideas to create nightstands from recycled boxes and stools; today we continue working for the little ones creating fun wooden children's headboards.
We have searched simple proposals, so that you can work on them without complications. To create original headboards like the ones we show you, you will only need plywood boards or boards and a jigsaw; in addition to paint and / or adhesives to give them color.
The children's headboards that we propose today will make a difference in the children's bedroom. If you have the necessary tools, the project will be economical. You can find 244x122x0,5 cm boards. from € 22; a very generous size to make any of the headboards.
Have all the tools and materials needed when starting to work is key. Not only will it save us time, it will also avoid the frustrations of "improvisation." By following these steps, you will not forget anything and work comfortably.
- Design the headboard on paper. Think about what shape you want to give the headboard; Cloud shape? Roof shape? Measure the width of the bed and take it to a piece of paper. Use it as a reference to create your design. Also think about the details or colors with which you are going to finish it. You already have it?
- Cut out the design and measure it. Write down both the width and the length on a piece of paper; this way you will know which board best suits your needs.
- Also write down the tools needed to complete the job. Asking yourself these questions may help you: Do you have a jig and sandpaper to file the edges? Do you need paint or varnish to give it color? What type of fastening will you use to fix it to the wall?
- Buy the material and organize the workspace. Having a clean and orderly workspace will allow you to work more at ease and with fewer distractions.
- Now you can start working. Using the paper template, transfer the design to the board, cut it out, sand the edges and have fun customizing the design.
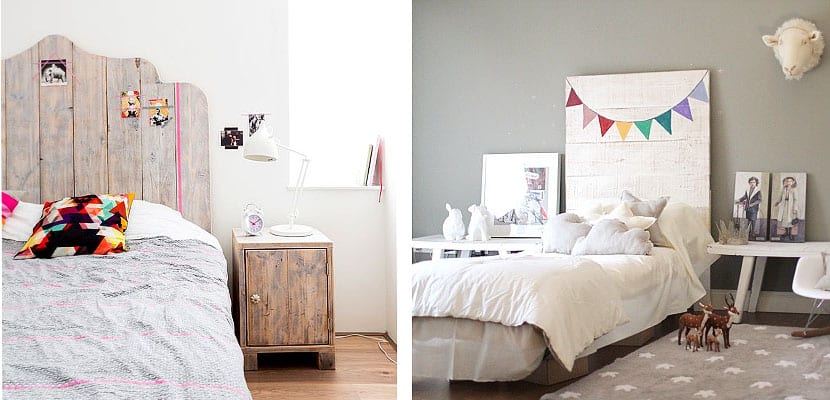
You don't have to stick to the ideas that in Decoora We propose them. You can go further and give free rein to your imagination by creating new shapes or personalizing the designs with other colors and/or finishes. Do you dare?